
Introduction to KMS Activation
A Microsoft Key Management Server (KMS) is a legitimate service offered under Microsoft Volume Activation 2.0 solution which is used to activate volume licensed Microsoft products. The KMS allows automated activation of Microsoft products for organizations within their own network, eliminating the need for individual computers to connect to Microsoft for product activation.
The internally hosted KMS server activates client computers for a period of 180 day, once a machine is activated it will attempt to communicate with the same KMS server every 7 days to renew it’s activation resetting it license counter back to 180 days. If the KMS activated client is not able to re-communication to the KMS after 180 days, the machine will become unlicensed and go to it’s 30 day grace period and notify the user of this change. If the machine is not activated against the KMS after the 30 day grace period it will enter a reduced functionality mode until it is able to connect to it’s KMS or is changed to a MAK license key and activated with other methods.
a quick note, for Microsoft Windows to activate requires a minium of 25 computers to contact the kms server before it starts to activate machines on the network. For Microsoft Office it requires a minium of 5.
KMS Autodiscover
For this to work you need to have a few things in place first. Firstly a DNS record telling the machines when they come on the network the address they should activate against. To do this make sure, you put an entry in DNS like below.
1. Open the DNS manager on one of your Domain Controllers.
2. Expand out the management tree until you can see your Internal Domain’s Forward
Lookup Zone. Click on it, and make sure there are no A records for
KMS already in the zone.
3. Once no KMS A records exist, right click the Zone name and select Other New
Records.
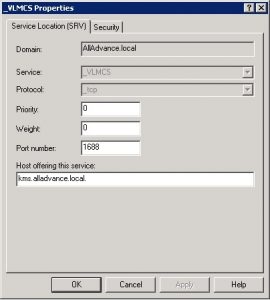
4. Select Service Location (SRV) from the list.
5. Enter the settings as shown above:
6. Hit OK to finish adding the record.
After you have done this, create an A Record for KMS.domain.com. to point it towards the IP of the KMS Server.
For this to work on Bind9 please add the following command.
kms.alladvance.local IN A (IP Address)
_vlmcs._tcp.alladvance.local. 3600 IN SRV 0 0 1688 kms.alladvance.local.
Good to know
For this to work flawlessly with client computers, make sure the clients are either part of the domain, preferably same as the KMS server, or are searching for the same DNS suffix in the dns entry. So my example above, you would make the DNS suffix in DHCP alladvance.local so clients will lookup and can see kms.alladvance.local is set to an IP and then the service record will activate them against the server.
If you do not set the suffix on a non member of Active Directory, the autodiscover feature will simply not work.
KMS is only for volume editions of Windows and Microsoft Office. This is normally available with a corportate enviroment.
Manually Activating
For Windows open the command prompt, (run as Administrator) and enter the following commands.
“SLMGR /skms kms.alladvance.local”
Press ok when it the machines says its been set.
Now type
“SLMGR /ato”
After you enter this command the machine will go off to the kms server and try to activate. So you should get a prompt saying its been activated.
Please Note. Once you have manually activated Windows or Office, the autodiscover will become redundant, and it will be burned into the computer. To use the autodiscover feature you will need to clear the manual entry, with the command “SLMGR /ckms” this will reset everything back to default including the default port 1688
For Microsoft Office
Depending on the version you have installed weather its 2010, 2013 or 2016. you need to open the command prompt and go to this directory. If you have a 32 bit edition installed go to the X86 folder of program files instead.
C:Program FilesMicrosoft OfficeOffice16 ———- Office 2016
C:Program FilesMicrosoft OfficeOffice15 ———- Office 2013
C:Program FilesMicrosoft OfficeOffice14 ———- Office 2010
Once the command prompt is this like this below, please type the following commands
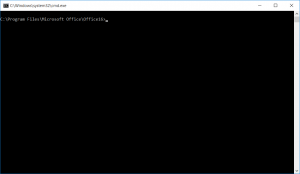
“cscript ospp.vbs /sethst:kms.alladvance.local”
Once the prompt has confirmed your choice, now type
“cscript ospp.vbs /act”
The prompt should then come back and say its been activated.